The roof protects a home from precipitation, high winds and debris. But it can also be a source of problems if it isn’t properly maintained.
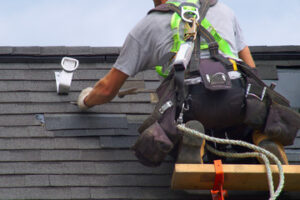
Some maintenance tasks include ensuring the seals around chimneys, vent pipes and other roof penetrations are intact. Inspectors should also check the condition of soffit and fascia boards for signs of damage or rot. Contact Roofing Montana for professional help.
While most homeowners assume that roof leaks are due to damaged or missing shingles, the reality is that a much more common cause is deteriorating flashing. Flashing is sheet metal fabricated to a specific shape, and it’s used in critical areas where water can easily penetrate the roof and damage the structure of the house. This makes it very important to inspect the flashing on a regular basis for cracks and gaps, so that problems can be addressed early.
Flashing is typically installed at wall and roof intersections, around chimney stacks, at skylights and other openings, and around roof drains. It’s also commonly used at sloped roof edges, to divert rainwater away from the area where a sloped eave meets a vertical sidewall. If a roof is properly constructed, the edge of the sloped eave should be protected by flashing, and there should be no gap between the eave and the vertical sidewall.
A professional roof inspector should carefully inspect the flashing at all of these areas, along with skylights and other penetrations. Leaks are often caused by flashing that has been compromised, especially at areas where thermal movement or differential movement can cause stress on the flashing.
It’s essential to look for dents or indentations in the flashing, as well as any rust or corrosion. Cracks or holes in the flashing can allow water to penetrate the roof and cause a number of problems, including leaking ceilings and walls. If the flashing is loose or missing entirely, this should be replaced immediately to avoid further damage to the roof and the home.
It’s also important to look for gaps or holes in the counter flashing, as well as any cracked or failed sealant. If there are any ice dams, check that the flashing is adequately protected by a drip edge or other type of barrier. Finally, check the gutters for blockages and debris. If there is standing water in the gutters, make sure it’s being diverted to a downspout and that the gutters are sloped to prevent long-term drainage problems. In addition to these inspections, a thorough roof maintenance checklist should include checking for and repairing leaks in the attic, and ridge and soffit venting to ensure that the attic is well ventilated and not overly hot or stuffy.
Clean the Gutters
Gutters are a critical part of the roofing system, protecting the fascia boards and roof deck, siding, and foundation from water damage. They collect rainwater that falls on the roof and divert it through downspouts away from the foundation, preventing damp basements and crawl spaces. When gutters are filled with debris, they can overflow and cause a number of problems. When this happens, the water may spill under shingles or behind siding and seep into the foundation, resulting in expensive repairs.
Regular cleaning of the gutters prevents clogs and water overflow, but it’s also important to inspect and clean the downspouts. Downspout screens and filters help catch smaller debris before it reaches the clog. If the downspouts are rusty, they should be replaced to prevent future corrosion and blockage.
A sagging gutter isn’t just unsightly – it can actually pull away from the home, causing structural damage and a host of other problems. If your gutters are sagging, consider replacing them or installing a gutter apron.
Gutter aprons connect the gutters to the home, keeping them from separating from the roof. They can be a useful addition, especially if your home is located in an area with high rainfall or soil erosion problems.
The apron also helps to reduce maintenance tasks by minimizing the amount of debris that accumulates in the gap between the roof edge and gutter. The apron can be installed at the same time as the gutters, or it can be installed separately.
A comprehensive roof maintenance program includes inspections, cleaning, and repair of the troughs and downspouts, as well as the flashing and the ventilation system. In addition, routine maintenance can prevent water leaks and moisture buildup that lead to rot and mold. A comprehensive roof maintenance program is also an effective way to save money compared to the cost of responding to emergency leaks and other problems. It generally costs three times as much to dispatch a crew for an emergency repair than to handle it during a regular maintenance visit. It’s estimated that avoiding just one emergency repair a season should more than offset the cost of the maintenance program.
Trim Tree Branches
In addition to preventing leaves, sticks and other debris from building up on your roof, trimming tree branches helps minimize the risk of them falling during storms. In some cases, large branches that hang over your house can cause damage to shingles or even the entire roof during severe weather, and they can also allow moisture to accumulate inside the home or block natural air flow. To keep your roof safe, check the growth of nearby trees on an annual basis and trim any branches that are hanging too close to your house.
The most common type of tree pruning is thinning cuts, which remove end portions of branches from the tree canopy. This reduces the overall size of a tree without changing its shape, and it allows more light to reach the interior foliage and ground below. Thinning should be done evenly throughout a tree, and it’s important to avoid cutting more than a fifth of its total canopy in any one year.
To make a thinning cut, start by sawing through the underside of the branch at a point 12 to 18 inches from where you plan to cut it off. Next, saw a few inches further out on the branch to where you can see a slight swelling or rough bark area, which is the branch collar. The last cut should be made outside of the branch collar, and it’s important to remove this stub as soon as possible because it can cause rot or even structural failure in the tree.
When pruning a tree, it’s important to use sharp tools. Dull saws and shears can damage the bark, and they’ll also create harmful rips that expose the wood to decay and insect infestation. It’s also a good idea to wear protective equipment and make sure you have the proper ladder and safety gear before climbing a tree to perform trimming work.
When pruning a tree, you should never cut the top of its leader, as this can lead to structural weakness and encourage water sprouts (weak, stringy branches that grow out from the forks of a tree). If a leader is lost due to storm damage or disease, replace it by splicing an upper lateral on the highest scaffold to a vertical position and removing it after one growing season.
Replace the Caulk
It’s important to check the caulking between the roof and the wood siding or shingles to ensure it is intact. Look for cracks or deterioration that could allow water into the home or cause moss and algae to grow. It’s also a good idea to re-caulk the areas around roof penetrations such as chimneys and vents to prevent leaks.
When re-caulking, it’s best to use roofing cement instead of silicone caulking. Silicone caulking is very slippery and can easily get off the shingle, while roofing cement is designed to stick to shingles. To remove the old caulking, first apply a caulk remover and let it sit for the amount of time recommended on the product label. Then, scrape away the softened caulking with a putty knife or specialty tool. If the caulk remains stubborn, wet a rag with isopropyl alcohol and rub over the area to prepare for the application of new sealant.
Another common roof leak culprit is the pipe boot or vent boot, which is typically made of galvanized metal and can corrode over time. If you notice the metal is corroding, it’s important to replace it immediately to avoid water seepage. To replace the pipe boot or vent, you’ll need to pry up the shingles surrounding it (or completely remove them) and then carefully remove the old one. You’ll then need to cut a piece of flashing to size, place it over the hole and secure it in place with roofing nails.
If your roof has a corner that meets the wall, it’s important to install a kickout flashing to prevent leaks. This is often done with a pre-made flashing strip you can purchase at your local hardware store, but if it’s not available you can make one by cutting a length of aluminum flashing and nailing it to the side of the house. Then, install a second piece of flashing on the other corner of the roof and secure it in place with a bit of roofing cement. Once you have the step flashing in place, you can begin installing the shingle courses above it.